
Build your blog with Github + Hugo Part 1
We people in analytics deserve our own place to show stuff.

I’ve tried Jekyll, Hexo and Hugo and now my website uses Hugo. It is simple, boring, flexible, and fast. The main reason is that it is simple. There’s not much you have to learn to get started.
Let’s cut to the chase.
Assumptions
- You know how to open and run simple lines in the macOS or Windows terminal.
- You will use
~/Sitesas the starting point for your site. (~/Sitesis used for example purposes. If you are familiar enough with the command line and file system, you should have no issues following along with the instructions.) - You can write content in Markdown.
- You have git installed and linked to your github account.
1. Install Hugo
Mac using home-brew
brew install hugo
Note to install extended version of Hugo.
More operation systems and install methods can be found on install instructions of Hugo.
2. Create a New Site
Open terminal and navigate to the folder that you want to work on your blog and then:
# replace <hyper-potato.github.io> with <your-github-username.github.io>
hugo new site hyper-potato.github.io
This folder is the root directory for all activities after. The best practice of naming is <your-github-username.github.io> if you are going to use Github Pages to host the site.
The directory structure should be like this
.
├── archetypes
├── config.toml
├── content
├── data
├── layouts
├── static
└── themes
Articles in markdown will be placed under content folder. Photos and favicon can be saved in static.
More details in each component is explained here.
3. Pick a theme
Note before you clone and use the theme you choose, make sure the theme supports math and code to avoid hassle later.
1) Get the theme
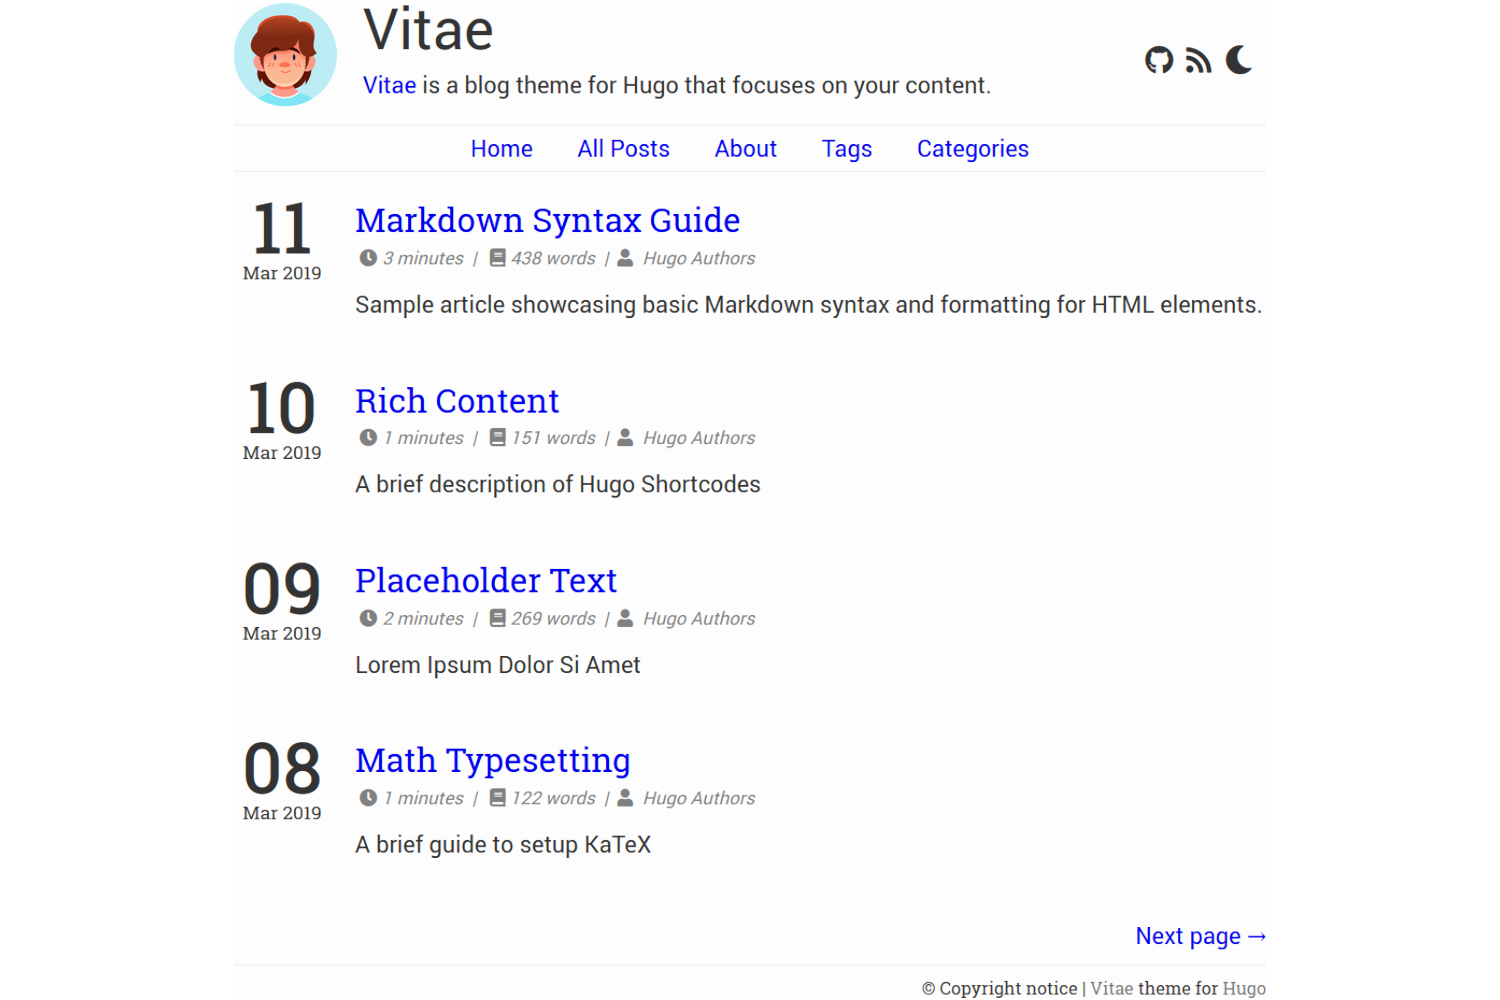
Here is an awesome Hugo theme compilation. Git clone your choice of theme. Here I use vitae as an example.
 You can install the theme by git clone.
git clone https://github.com/datacobra/hugo-vitae.git themes/hugo-vitae
2) Quick config
You can also copy example content and default config file for a quick start
# Copy the default site config and example content
cp -r themes/hugo-vitae/exampleSite/*   ./
More details see here
To configure your site according to your needs, just open the config.toml and adjust the settings. All options you should customize to yours. Make sure to read all the comments, as there a few nuances with Hugo themes that require some changes to that file.
3) Creating a post
hugo new posts/hotday.md # new post
You can now go ahead an edit the newly created file under the content directory. Once you are finished editing, to have hugo generate the page, set draft = false in the articles front matter.
4) Organizing pages
The above example demonstrates how to create a pages and posts. Hugo automatically applies the list templates for a directory of posts, which works well for blogs and posts. However, you may want at times want to override this behavior and create a standalone page (like an about page or projects page) or have more control of what content is listed from within the directory. In such cases, you can override the default behavior by placing an index.md file in the corresponding content directory.
hugo new projects/index.md
5) Test and configure your site
Start hugo server locally,
hugo server
and visit http://localhost:1313/ to see your site.
All options you can and should customize are commented. By default hugo will watch your files for any changes you make and automatically rebuild the site. It will then live reload any open browser pages and push the latest content to them.
Note: If you are seeing a blank page it is probably because you have nothing in your content/ directory. Read on to fix that.
Again, check out documentation and play around with features along the way.
After the test is done, kill the server by ctrl + C
4. Hosting a Hugo website
A Hugo blog is completely static. GitHub Pages is a great place where you can host a Hugo blog, for free. But .github.io site also looks okayish.
Here I deploy Hugo as a GitHub personal site as an example.
1) Create a Github repo
Create a new repo with the same name as the project folder (your-github-username.github.io) on Github website. This repo is used to store all the content in the project folder.
2) Initialize the blog folder
git init
git add .
git commit -m "Initial commit"
After the repo is initialized, run the following command in the blog folder to push blog files.
git remote add origin https://github.com/your-github-username/your-github-username.github.io.git
git push -u origin master
For detailed instructions on how to host website on Github, go to here.
3) Publish the public folder
Here is a bash file to deploy site, less hassle. Save the following as deploy.sh and then run the script each time from blog root directory to deploy the site.
#!/bin/bash
# check if public folder exists
hugoPath=`pwd`
publicPath=`pwd`"/public"
if [ ! -d $publicPath ];then
  echo public not exist
  exit
fi

# remove all files generated before in public/
cd $publicPath
rm -r ./*

# Back to parent folder and re-generate
cd $hugoPath

hugo # This is the line to build the website!

# go to public and publish
cd $publicPath
git add -A .
time=$(date "+%Y-%m-%d %H:%M:%S")
commit="Site updated:"$time
echo $commit

git commit -m "$commit"
git push origin master
sh deploy.sh
4) Back up source code
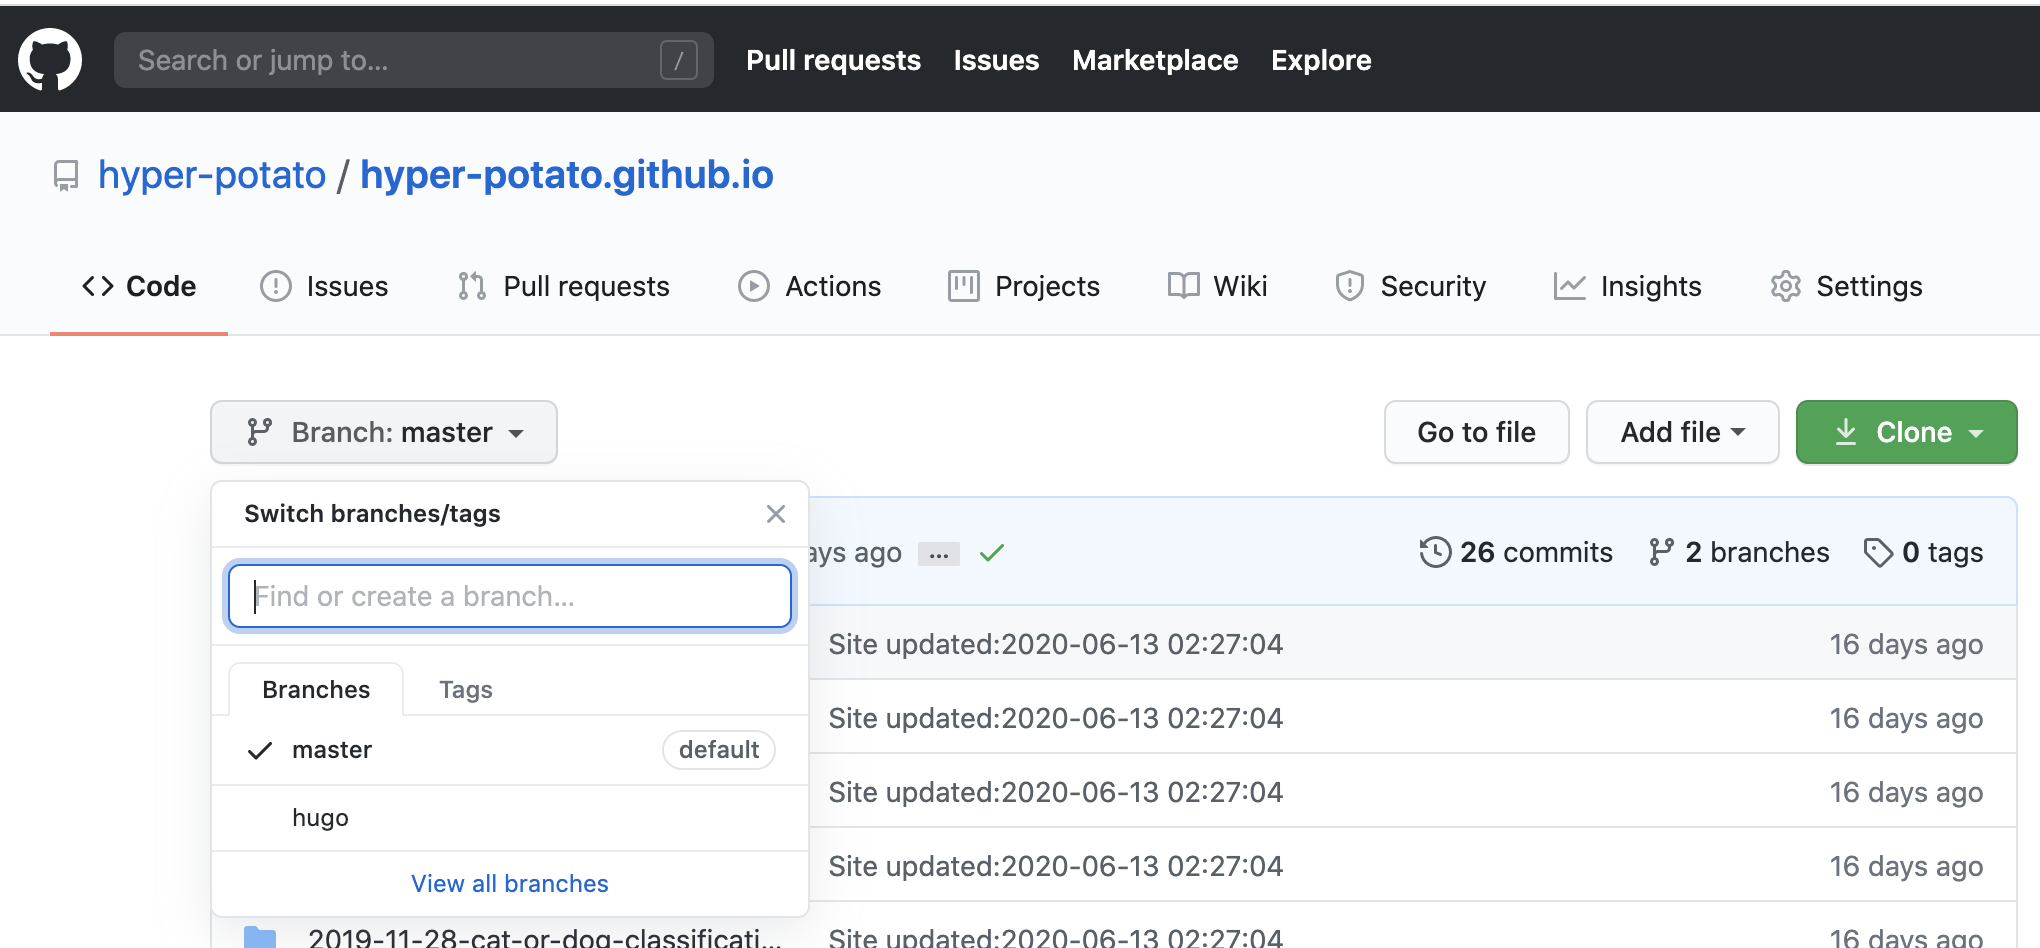
The hugo command will generate static files of the website in the public folder. However, Github will only load code and publish site from master branch or master branch /docs by default.
One solution to this is to push only public directory to master branch, but create a hugo branch in the same repo to place source code.
cd .. # back to root directory
git checkout -b hugo
git add .
git commit -m "commit source code"
git push -u origin hugo
4+) Back up source code on recurring basis
# in the root directory
git checkout hugo
git add .
git commit -m "commit source code"
git push -u origin hugo
Have Fun!
After playing around with css and html for long, I’m kinda into website development now…